The master cleanse is water, lemon juice, maple syrup, and cayenne pepper.
Daily doses can be made up ahead of time and stored in a pitcher in the fridge.
Daily dose:
60 ounces filtered water (not city water)
12 TBSP lemon juice (fresh squeezed)
12 TBSP maple syrup (100% natural)
1/2 tsp cayenne pepper powder
Single dose:
10 ounces of water
2 TBSP lemon juice
2 TBSP maple syrup
1/10 tsp cayenne pepper powder
To successfully do a cleanse you must not eat anything!!!
You must drink this drink for breakfast, lunch, and dinner.
You can drink this any time you feel hungry.
You must drink at least 40 ounces of the master cleanse a day. Most recipes recommend 60 ounces a day.
During the day drink plenty of water.
You should drink your body weight in ounces each day.
Do NOT drink any coffee, soda, caffeine, or alcohol.
Expectable beverages include water, decaffeinated tea without sugar, 100% fruit juice, broth, and any drink that is all natural with NO sugar added. Many dieters use laxative tea to help aid in the release of toxins.
The whole idea of cleansing your body is to give your digestive track a break. By giving your body a break from processing food it allows your body the chance to rid itself of toxins.
Human bodies are not meant to constantly digest food. Our bodies need down time to deal with the plethora of junk we ingest.
The master cleanse can be done for as few or as many days as you feel you can commit to.
I do it for three days every six months. Many experts recommend ten days. I've even read of a man that did the cleanse for one hundred days.
The master cleanse helps you rid your body of toxins and helps you lose weight.
My husband once did it for a week and lost ten pounds.Afterwards he became really aware of the amounts of needless food he was ingesting.
Results may vary. If you are not a healthy individual please consult your doctor before trying this diet. Releasing too many toxins at once can make you ill.
With any diet the key to success is your own commitment. Pump yourself up a couple days before you begin the cleanse.
You should be excited about committing to cleanse you body. This is beneficial for your body, your mind, and truly your life.
Exiting the cleanse is also an important step. To continue the benefits of the cleanse you must not jump back into junk food. Ease back into food by choosing non processed options. Eating slowly while paying attention to your serving amounts can help you become more conscience about how you treat your insides.
Always drink plenty of water for it is the elixir of life whether you are cleansing or not.
The master cleanse is NOT a cure all of the unhealthy choices we make on a daily bases. However, I do find the occasional reboot beneficial to my entire system.
By letting my tummy shrink up I can actually feel full. It is impossible to feel full when you are constantly stretching your tummy with meal after meal after meal after meal.
Sunday, October 28, 2012
Monday, October 22, 2012
DIY Moon sand
This recipe is to make your own moon sand at home out of flour and oil.
Materials:
Flour
Oil
Container
I used baby oil but you could use any kind of oil.
I put a couple cups of flour in a container and slowly mixed in the oil until the mixture crumbled but could still hold shapes when pressed.
If it is too dry add more oil. If it is too wet add more flour.
I made the boys their moon sand in the summer and it is still just as fun as the day I made it five months ago.
The boys play with their containers of homemade moon sand all the time. They focus on it which is rare for these wild boys. I love that not only do the boys enjoy playing with this super cheap DIY moon sand but they love sharing the fun when their friends come to visit. Friends and cousins of all ages get loads of entertainment from this simple craft.
Great craft for any age as long as they don't eat it :-)
I was going to make some up for gifts this holiday season. I just cant decide what size container to put them in.?.hmmmm....Or what color to make them?? Or maybe no color and just glitter, oh yeah, glitter! Sorry, squirrel.....................................
Wednesday, October 17, 2012
DIY all purpose cleaner
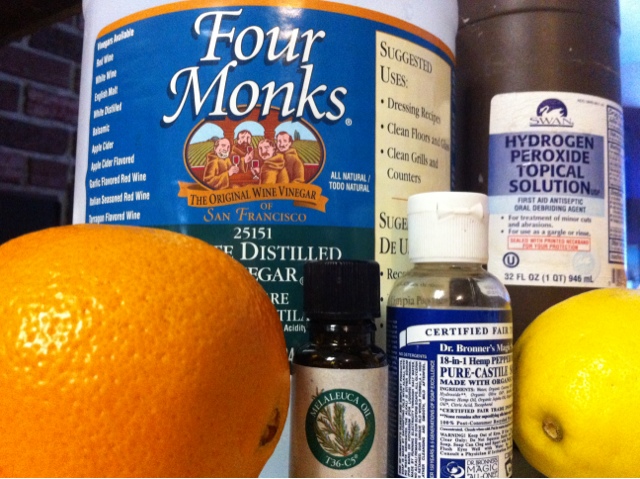
2 cups vinegar
1 cup hydrogen peroxide
1 to 2 tsp Dr. Bronners soap
30 drops tea tree oil
Citrus or any essential oil you like
Dilute with water until the concentration you prefer.
I steeped my cleaner for two days to draw out the citrus and then strained it into a spray bottle.
This all purpose cleaner really works!!!!
It removed red wine and permanent marker stains. This stuff eats through grim and is all natural.
It has cleaned and deodorized everything I cleaned so far.
I can honestly say it is better than most of the natural store bought cleaners.
Great for kitchens, bathrooms, kids rooms, garages, floors, and probably anything else that can get icky and sticky.
Wednesday, October 10, 2012
DIY compost
Composting can cut down on waste by as much as half in a household. I just made up that statistic. But seriously, half is a lot when you stop and think of all the food waste one person can make in one day, week, month, or year.
I started composting a couple of years ago. I was amazed by all the things that I could put in my compost. I compost so much now that I'm a vegetarian. So much in fact that I needed a bigger compost to accommodate my super composting habits.
After searching the web for bigger compost containers I was disgusted at the price of most of the styles I liked. Even most of the do it yourself composts were still more money than I wanted to spend.
After seeing my friends compost container that she had made out of pallets, I knew this was the size and price I was looking for.
A compost made out of pallets is super easy and cheap. All you need is 3-4 pallets, chicken wire (the smallest mesh available), and a spot to build it.
I attached chicken wire on the inside of the pallets with a staple gun. Then I propped up the pallets how I liked them. Finally I drilled screws in the corner to secure the compost. And I was ready to compost !!!!!!!
Once my compost got a bit full I put a piece of plywood in the front as door to hold it all in.
Now all you need to do is fill it with food waste (no dairy or meat), dirt, yard debris, and farm animal waste (no dog or cat waste).
Once a month I water it really good and toss it around with a pitchfork.
Within one year you should have the best soil you have ever gardened with.
Compostable items:
Shells of ANY kind
Feathers
Farm animal waste
Vegetables
Fruit
Hay
Ash
Grass
Weeds
Dirt
Paper
Cardboard (small amount)
Yard debris
Soil
Sand
Moss
Other compost
Not too much:
lawn clipping or pine needles
No meat
No dairy
No cat or dog waste
A good blend is critical. You don't want too much of one substance.
Saturday, October 6, 2012
iPhone holder speaker amplifier
Take an tape cassette case flipped over on itself. It makes a great iPhone holder stand contraption. What is even better is it acts as an amplifier for the speakers if you are listening to music on your iPhone.
This is a great use of an old tape cassette case.
I love up-cycling stuff it's rad.
This is a great use of an old tape cassette case.
I love up-cycling stuff it's rad.
Monday, October 1, 2012
DIY fruit fly trap
Materials:
Paper
Jar
Tape
Vinegar
Roll paper up like a funnel with a tiny hole in it and tape it. Pour vinegar into the jar to cover the bottom. Place funnel in and tape around the rim so no flies can escape. I cut down the paper down so it's not so big. Set the jar in your fruit area and watch them be attracted.
When the jar gets full of flies take them outside and set them free. Unless you want them to die than you add a drop or two of dish soap and they will drowned.
I have no fruit flies in my jar because it works so well. Actually there are two in there you just can't see them.
DIY solar cooker
I built this solar oven out of a reflective car windshield visor thingy. I bought it at the auto store. This project cost me less than $10
Supplies needed:
Visor thingy
Black pot with lid
Reynolds oven bag
Bucket
Ive read a lot about building DIY solar cooker online. From my research I have concluded that this style only gets up to higher temps like 350 in the southern states. I live in Oregon and can only get mine up to 240 so far.
Well that's enough free heat to cook a lot of things. So in my book this is a great skill to have.
My first day I heated up some turkey cheddar sausages for lunch and then cooked up a apple cobbler for dessert.
Both were awesomely delicious.