-2 cans of tomato sauce
-2 tbs fresh ground cumin
-1 tsp garlic
-1 tbs diced onion
-1 tsp chili powder
Or 2 cans of tomato sauced mix with 1 pack of taco seasoning.
Filling:
-corn tortillas
-2 cans refried beans
-1 can black beans
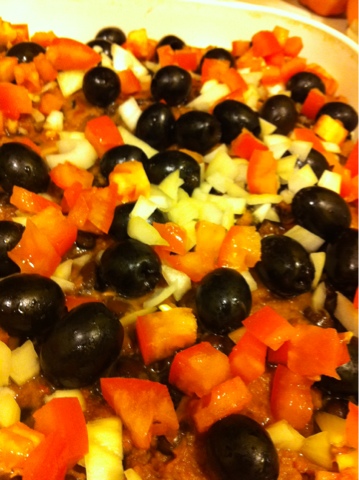
-2 cans olives
-1 onion diced
-1 big tomato diced
-1 lb of pepperjack cheese
Preheat oven to 350*
In a big casserole dish put a spoonful or two of enchilada sauce down a smear around. Layer 6 small corn tortillas smear one can of beans on tortillas layer. Sprinkle half the can of black beans on the layer. Add one can of olives, half the onion, half the tomato, and one third of the cheese evenly to this layer. Sprinkle with a couple tbsp full of sauce and repeat
After the second layer is complete top with 6 more tortillas, the rest of the cheese, and the remaining sauce.
Bake for 45 minutes to one hour or until bubbly and golden brown.
Add ins:
Whatever you would like
Toppings:
Guacamole
Sour cream
Olives
Onion